Top plastering tools every Pro needs
Here are the essential plastering tools every professional needs, and tips on selecting the right tools for you.
Like any specialist trade, you need the right plastering tools if you want to get the job done right.
High-quality plastering tools will reduce labour time significantly.
They deliver high-quality outcomes and could give your work an air of sophistication.
Proudly Australian-owned and operated Pro Plaster offers a comprehensive range of plastering tools as well as manufacturing its own range of compounds and private-label products.
Here are the essential plastering tools every professional needs, ranging from beginner to the seasoned professional and large commercial contractor.
1. Trowels and Hawks |
|
|
Trowels and hawks are among the most fundamental plastering tools every plasterer needs. The humble plasterers trowel is the most basic tool of the trade to apply plaster to surfaces. Stainless steel trowels are the most common and typically come in two sizes for professional use: 290mm and 355mm. Hawks are a great time saving tool used to hold compound so that you can quickly and easily get compound on to the trowel and then on to the surface you are plastering without the need to carry the whole bucket. These are especially useful for when you need to work from a scaffold or a workstation and feature hollow handles so they can be mounted easily. |
  |
2. Automatic tools - boxes |
|
|
Once you move on to larger jobs where you really need to punch out the metres it is time to start looking at automatic tools, specifically flat boxes. Flat and high-top boxes allow you to significantly speed up compound application and as they are typically attached to a pole you won’t need scaffolds, ladders or plastering stilts. Boxes come in various sizes ranging from 6 inch (150mm) to 12 inch (300mm). Popular brands include Level5 Tools, ranging from a 7 inch to a 14 inch, as well as Columbia and Tapepro. Each with their own benefits, manufacturers warranties and price points to suit your individual preferences. |
 |
3. Skimming blades |
|
|
They come in a variety of sizes, from 7 inch all the way up to 48 inches. Blades are replaceable and are sold individually or can be purchased in a kit in a range of sizes. |
 |
4. Taping machines |
|
|
The entry-level machines will often require you to use a scaffold and you will get 6 to 12 months use out of them, consequently they come at a lower price point. Mudboxes are more durable and with proper maintenance can last up to 10 years. Both machines are simple to master after a short period of time. Bazookas are far more mechanically complex and require a lot more maintenance. They also take a bit more learning time to master correctly. But once mastered they cut time on the job significantly. A bazooka has the added bonuses of applying tape and compound at the same time, as well as cutting the tape once taping the joint is completed. |
 |
5. Internal corner finishing kits |
|
|
Internal corner finishing kits are another time saver for finishing inside corners to complement taping machines and automatic tools. These kits will save you time and give you a great finish. The Commando Set from Columbia Tools is a great introduction to Semi-Auto tools for the part-time finisher, or someone who is looking to make the leap to Automatic tools but doesn’t want to jump right in yet. This set will save you time and give you a great finish. |
 |
|
For the ultimate in internal finishing tools, the Can-am brand offers the better (if not the best) internal kits on the market. The CanAm Aussie Professional Kit has been put together specifically for the Aussie market and comes with a lightweight Inside Corner Roller and Extendable Handle which allows you to embed the tape much deeper, making it a breeze. |
 |
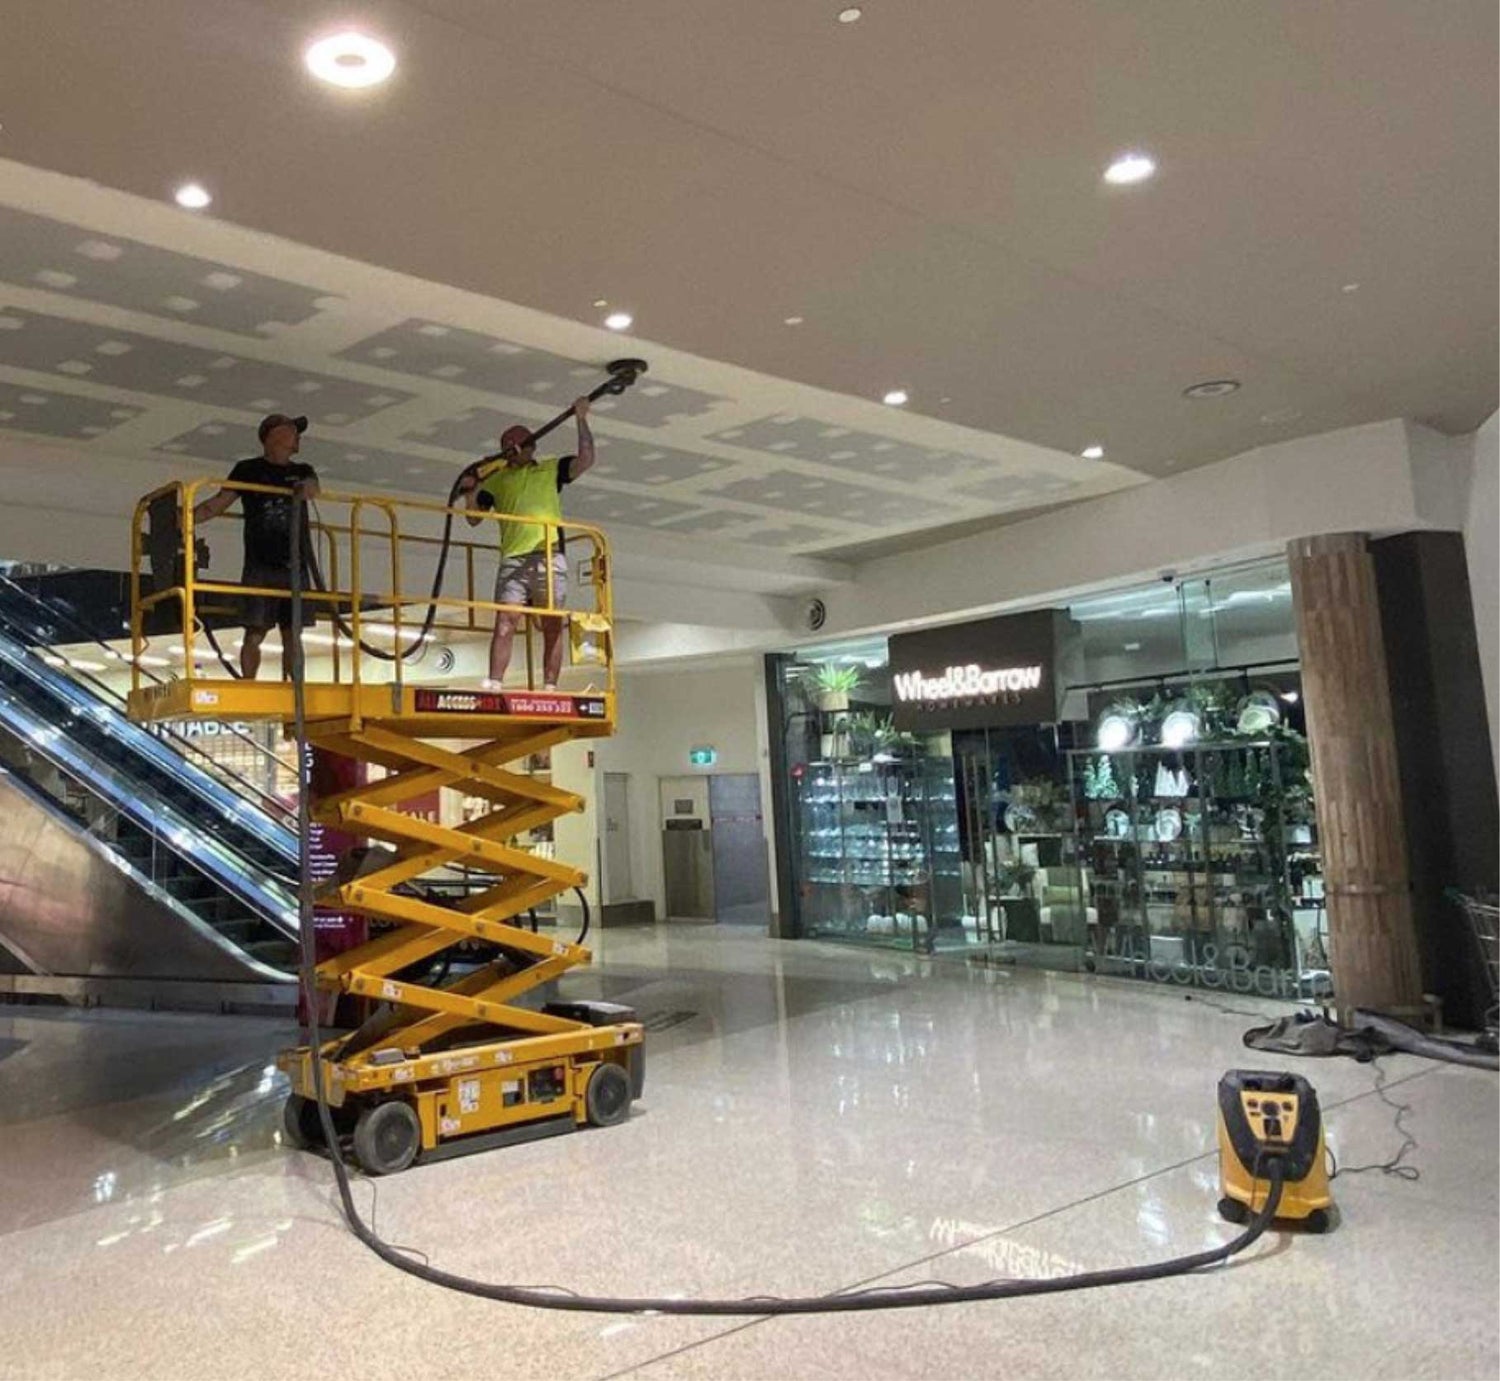
6. Sanders |
|
|
Once you’ve completed your plastering job, lightly sanding may become necessary to remove spots and bumps particularly on the joins. It will also help to remove any visible imperfections that may become apparent after painting. Depending on the size of your job you may be using a hand sander, pole sander for ceilings or higher wall, or for larger jobs an electric power sander. Once thing to consider when sanding with a power sander is that they can leave very fine swirl lines. Pole sanders obviously provide a more affordable option. The Sander Electric Giraffe INTEX offers a lightweight, perfectly balanced design that significantly reduces the effects of fatigue and repetitive strain injury (RSI) particularly during ceiling operations. Finally, cleaning after sanding is an imperative but can be time consuming. Using a vacuum dust extractor while sanding will ensure minimal clean-up post sanding and eliminates the need to wear a mask. |
|

Pro Plaster offer the largest range of tools and supplies - online & in-store with 4 trade centres and warehouses across Australia.
If you want to find out more about how Pro Plaster can help your next project, you can check out our store online, head into one of our trade stores in Queensland, or use our live online chat system to get a quick response.
Pro Plaster’s products are all Australian-made and developed and tested in-house for Australian conditions.

Bundles are specifically designed to include the products needed to upgrade your toolkit.